
Where you place a fume cupboard matters. In fact, it matters as much as which model you choose. You see, not every lab is created equal. Even a perfectly specified unit in the wrong location will struggle to contain. Position it next to a doorway, underneath an air supply, or too close to a walkway, and containment drops, alarms trip, and users lose confidence in the kit.
The frustrating part? Most of these problems are baked in at the drawing stage. Nobody chooses a bad location on purpose. It happens when the layout is fixed before anyone discusses process workflows and the facility's mechanical and electrical specifications. By the time the contractor discovers these plans, the locations are already fixed.
So, in this guide, we aim to rectify that. We will cover the space planning decisions that affect containment, clearances, positioning, services, access and the most common mistakes we see on a day-to-day basis
A fume cupboard works by pulling air through the sash opening at a steady speed. That face velocity usually sits between 0.3 and 0.5 m/s. Now, it may sound like plenty. But in reality, it is a gentle breeze, and gentle breezes are easy to disturb.
Air moving across the face of the fume cupboard creates turbulence at the sash. Eddies (circular, swirling movements of air that spin differently from the main wind current) form along the edge of the opening. Those eddies can drag fumes out of the chamber and into the users breathing zone. To be clear, the cupboard is still extracting, it just isn’t containing.
The tricky part is that you can’t see it happening. A unit can technically still pass a face velocity test and still be prone to turbulence under real working conditions. That’s why type testing to BS EN 14175 dives into containment and not just airflow numbers on a screen.
Here are three of the most common mistakes that we see inside laboratories:
These are the distances we work to when planning a fume cupboard layout. Treat them as minimums. More space is always better.
| Layout | Keep the fume cupboard away from | Minimum clearance | Why it matters |
|---|---|---|---|
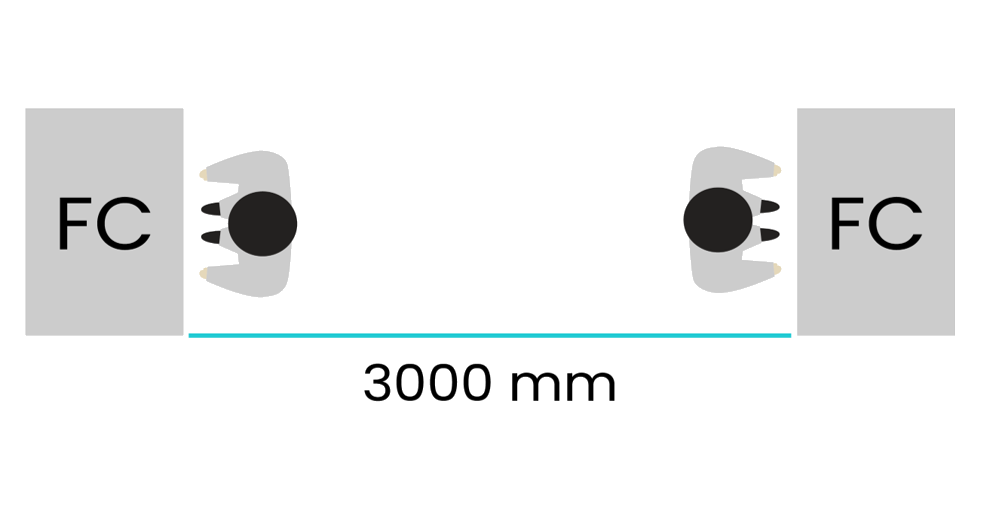 |
Opposing fume cupboards | 3000 mm | Stops two users working back to back and disturbing each other's units |
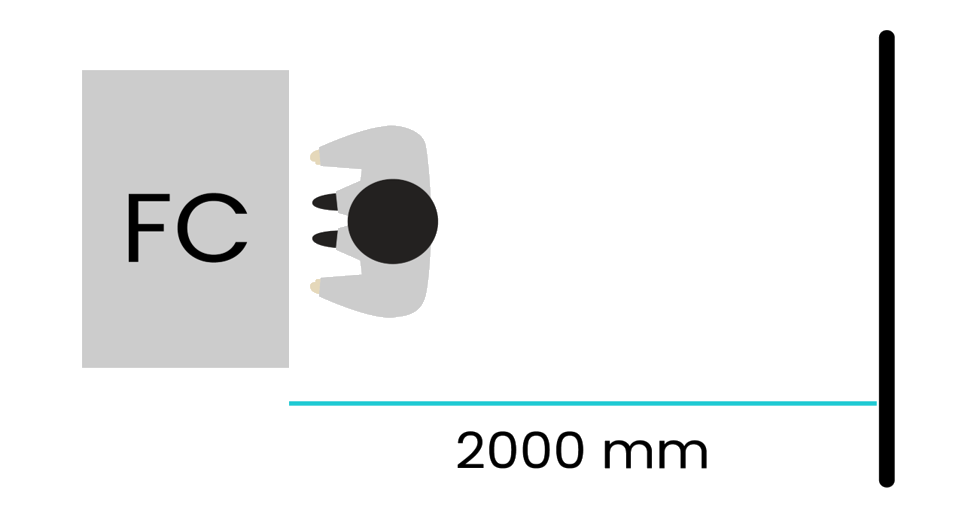 |
Opposite wall | 2000 mm | Gives the operator room to step back and move equipment |
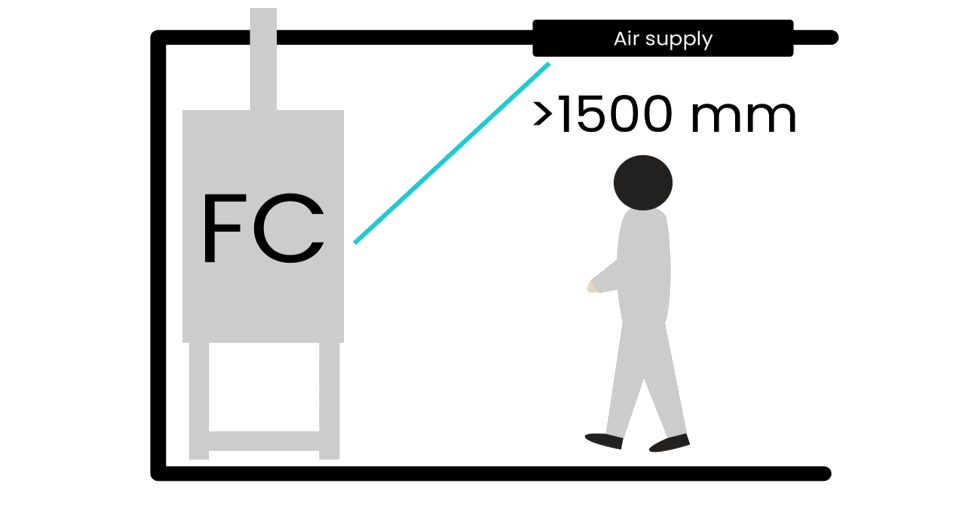 |
Supply air outlets and diffusers | 1500 mm | Stops supply air blowing across the sash |
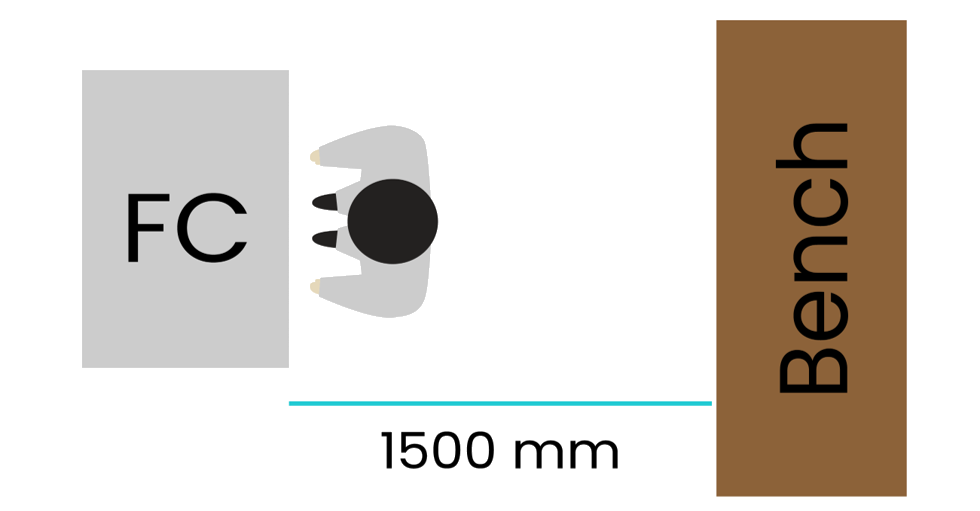 |
Bench opposite the sash | 1500 mm | Keeps a clear working zone in front of the fume cupboard |
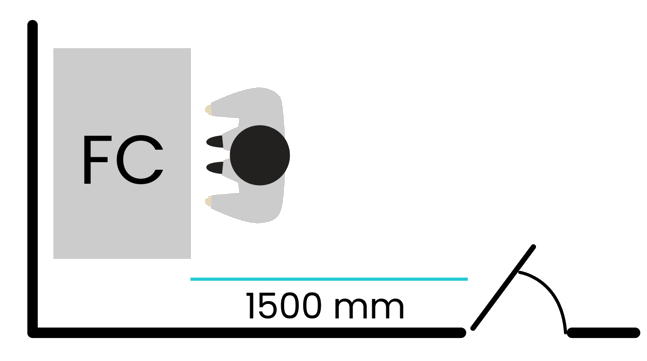 |
Door in the wall facing the sash | 1500 mm | Door swings push gusts straight across the opening |
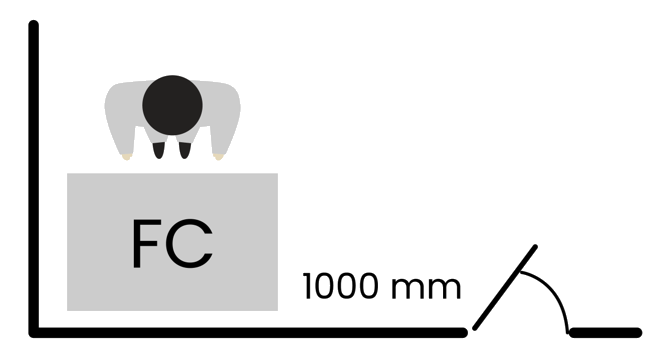 |
Door in the same wall as the fume cupboard | 1000 mm | Keeps door traffic and pressure changes away from the side of the unit |
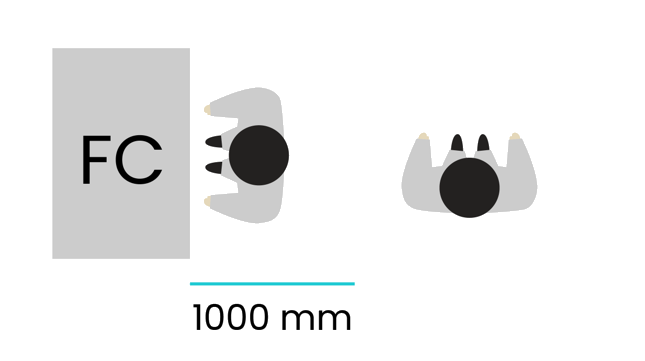 |
Walkways and pedestrian traffic | 1000 mm | Keeps the wake of passing people clear of the opening |
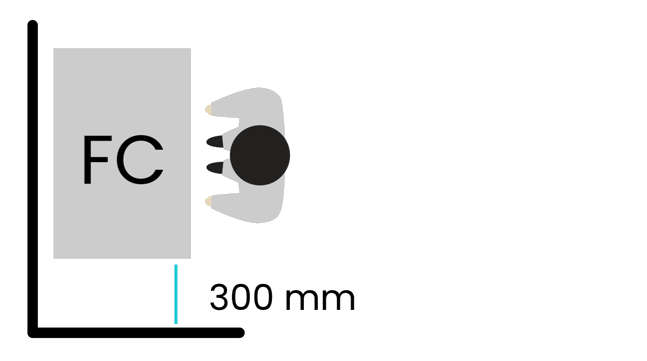 |
Adjacent wall | 300 mm | Leaves room to approach the sash and service the unit |
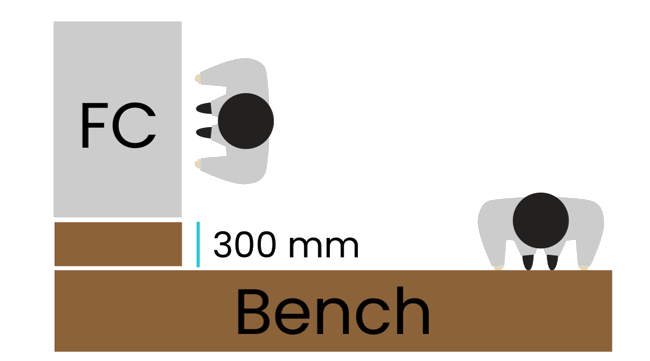 |
Workers at a neighbouring bench | 300 mm | Stops another worker being forced too close to the fume cupboard |
Doors are one of the worst offenders in many laboratories. Every swing pushes a wave of air into the room. Put a fume cupboard close to a door, and every visitor becomes a containment test. Walkways are less dramatic but more constant. A main route past the sash means a steady stream of disturbance all day long. Not an ideal situation, so please maintain a distance of at least 1 meter.
Air diffusers often get missed because they form part of the supply system, not the equipment plan. Check both sets of drawings together. Air leaving the diffuser should never be aimed toward the workspace of the fume cupboard. You should also prevent any excess airflow from reaching the sensors on the fume cupboard. Low-velocity, perforated diffusers placed away from the sash give the most stable conditions. We recommend at least 1.5 meters of clearance.
Two fume cupboards facing each other across a narrow aisle is a common layout. But it’s also a poor one. Technicians working back-to-back can disturb each other's units. Remember, each fume cupboard needs a sufficient volume of air to maintain containment. The last thing you need is a dogfight between two fume cupboards over who gets what. So, give them ample room to breathe.
The user needs room to stand, step back and move equipment in and out of the fume cupboard workspace. It may seem like common sense, but keep the zone in front of the sash clear of trolleys, bins and storage containers. If someone has to squeeze past the operator, the layout is far too tight for both the operator and the fume cupboard.
The best spot is usually the quietest one. Think of the fume cupboard as a breathing workstation that needs a steady flow of calm air, not a feature that needs to be seen. There’s no perfect rule of thumb here; make sure you consider the points referenced in the data table under Recommended Clearance Distances.
Positioning your fume cupboard at the far end of a lab, away from the entrance, is often ideal. Dead-end bays work well because no one walks past them on the way to somewhere else. If the lab has a main circulation or process route, it can make sense to position fume cupboards along the way. But remember the 1-meter clearance space from foot traffic. In other instances, isolated areas work well because the airflow is ample and undisturbed.
Corners can work, but watch the side wall. A unit tight to a wall can lose access for servicing and limit how users approach the sash. Windows are a different story. An opening window beside a fume cupboard is an uncontrolled draught waiting to happen. If windows open, keep the cupboard well away or specify them as fixed. In our experience, avoiding windows altogether is usually the best course of action and the safest.
Now, although this may sound obvious, never place a fume cupboard on or next to an escape route. If something goes wrong inside the chamber, nobody should have to walk past it to get out. The same goes for fire exits.
Labs with several units often group them along one wall. This keeps ductwork runs short and simplifies service routes and connections. Side by side is fine, as long as each unit has its own working space and users aren't standing on top of each other. Ideally, a 300 mm gap between the interior worksurface walls is best. Avoid facing rows unless the aisle between them meets the clearances referenced above (3 meters).
The footprint on the drawing is only part of the story. A fume cupboard needs space to arrive, space to be serviced and a clear route for its ductwork and services. Let’s cover the basics.
"Standard" fume cupboards typically range from 1000mm to 2100mm wide. Those sizes rarely match the room. Too often we see a gap at the end of a bench run because the nearest catalogue size didn't quite fit. A bespoke width can fill the space properly and give users more working area. On the other hand, you could specify your fume cupboard dimensions early and include them in the designs. Obviously, TION is a fan of early-stage planning. Late-stage fume cupboard specification is a nightmare to deal with.
Think about depth and height too. Base cabinets, solvent storage and sinks all affect how the unit sits in the bench run. If equipment inside the chamber is large, check the internal dimensions early. A rotary evaporator that won't fit is a very expensive discovery.
Door widths, corridor turns, lift sizes and ceiling heights all need checking before the unit is ordered. A fume cupboard that can't reach the lab means specialist lifting, a split build or, in some cases, a window removal. Our guide to choosing fume cupboards covers access in more detail.
The type of unit you choose shapes where it can go.
Ducted fume cupboards are tied to their duct route. Once the riser position is fixed, the cupboard's location is largely fixed too. They also pull large volumes of air out of the room. That air has to be replaced, so the supply strategy and the cupboard position must be planned together. A VAV system reduces that demand when the sash is lowered.
Ductless fume cupboards offer more freedom. With no ductwork, they can sit almost anywhere with power. That freedom isn't a free pass, though. The same rules on doors, walkways and supply air still apply. Leave space above the unit for filter changes too.
However, if you're still deciding between the two, our guide to ducted vs ductless fume cupboards covers the wider trade-offs.
An accessible fume cupboard needs an accessible approach. A wheelchair user needs room to turn, line up with the sash and reach the controls. That space can't double as a walkway, or the clearance rules above are broken every time someone passes.
Height-adjustable units also need vertical room. Check the ceiling height at the top of the stand's travel, and allow for flexible duct and service connections. Our complete guide to accessible fume cupboards covers controls, sash design and specification in full.
So, after everything we have considered in today's article, what are the most common mistakes we see on a day-to-day basis? Find out below.
1. Placing the cupboard by the door. It looks convenient on the plan. In use, it means constant draughts.
2. Ignoring the ceiling plan. Diffusers are drawn by one consultant, furniture by another. Nobody overlays them.
3. Buying standard sizes by default. The room gets compromised to suit the catalogue, not the other way round.
4. Facing units across a narrow aisle. Two users end up working back to back.
5. Forgetting the delivery route. The unit is made, delivered and stuck in the corridor.
6. Storage in the working zone. Bins, trolleys and cabinets creep into the space in front of the sash.
7. Treating ductless as "put it anywhere". No ductwork doesn't mean no airflow rules.
Early. Ideally at RIBA Stage 2 to 3, before the layout, diffuser plan and riser positions are locked. A short conversation at that point costs nothing. Moving a riser at Stage 4 costs a great deal. We explain why in Designing Labs Backwards.
Final Thoughts: Good space planning won't make headlines. Nobody walks into a lab and admires the distance between the door and the fume cupboard. But they will notice when containment fails, when alarms keep tripping or when a unit won't fit through the door.
The fix is simple. Plan the air before you plan the furniture. Overlay the ceiling and furniture drawings. Keep fume cupboards away from doors, walkways and diffusers. And bring your supplier in while the layout can still change.
If you'd like a second pair of eyes on a lab layout, get in touch with the TION team. We're happy to review your drawings and flag anything that could affect containment.
Read our Privacy Policy for more information on how we collect and process data.



No thank you
Read our Privacy Policy for more information on how we collect and process data.